How to Crochet a Cute Little Frog: A Fun Amigurumi Project
There is something especially charming about tiny crochet animals. A few simple stitches, some colorful yarn, and a little stuffing can turn into a character with a personality of its own.
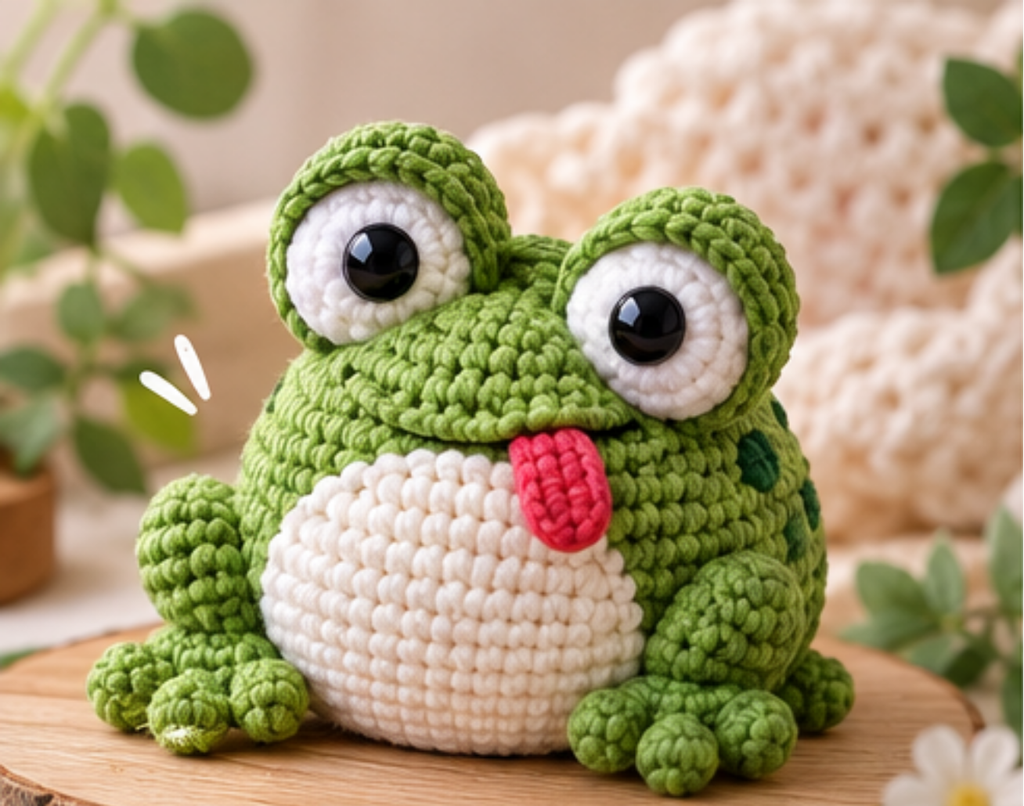
If you’re looking for a fun crochet frog project, this little amigurumi frog is a wonderful choice. It features a rounded green body, a contrasting white belly, oversized eyes, tiny toes, and a playful red tongue.
The finished frog is small—approximately 7 cm (2.7 inches) when made with the materials used in the original project—making it a lovely little handmade decoration or gift. 2 in 1 Frog
In this tutorial, we’ll look at how the different pieces come together and how to assemble them into one adorable little frog.
What You’ll Need
Before starting your project, gather your crochet supplies.
Materials
- Green cotton yarn
- White cotton yarn
- A small amount of red yarn
- A small amount of darker green yarn for decoration
- 2 mm crochet hook
- Polyester fiberfill
- 6 mm safety eyes or suitable black beads
- Tapestry needle
- Sewing pins
- Scissors
The reference project uses 100% cotton yarn and a 2 mm hook. The recommended materials also include stuffing, safety eyes, a large-eye needle, and sewing pins. 2 in 1 Frog
A Note About Hook Size
Amigurumi is normally worked quite tightly. This is important because you don’t want large gaps between the stitches where the stuffing can be seen.
If your stitches are too loose, try using a smaller hook. 2 in 1 Frog
Crochet Stitches Used
This little frog uses several common crochet techniques.
You should be familiar with:
- ch — chain
- sc — single crochet
- dc — double crochet
- sl st — slip stitch
- inc — increase
- dec — decrease
- Puff stitch
The project is primarily worked in the round, with increases used to create the rounded shapes and decreases used to shape the smaller pieces. 2 in 1 Frog
If you’re comfortable with basic amigurumi techniques, you’ll find that the construction is made from several relatively small pieces that are joined together at the end.
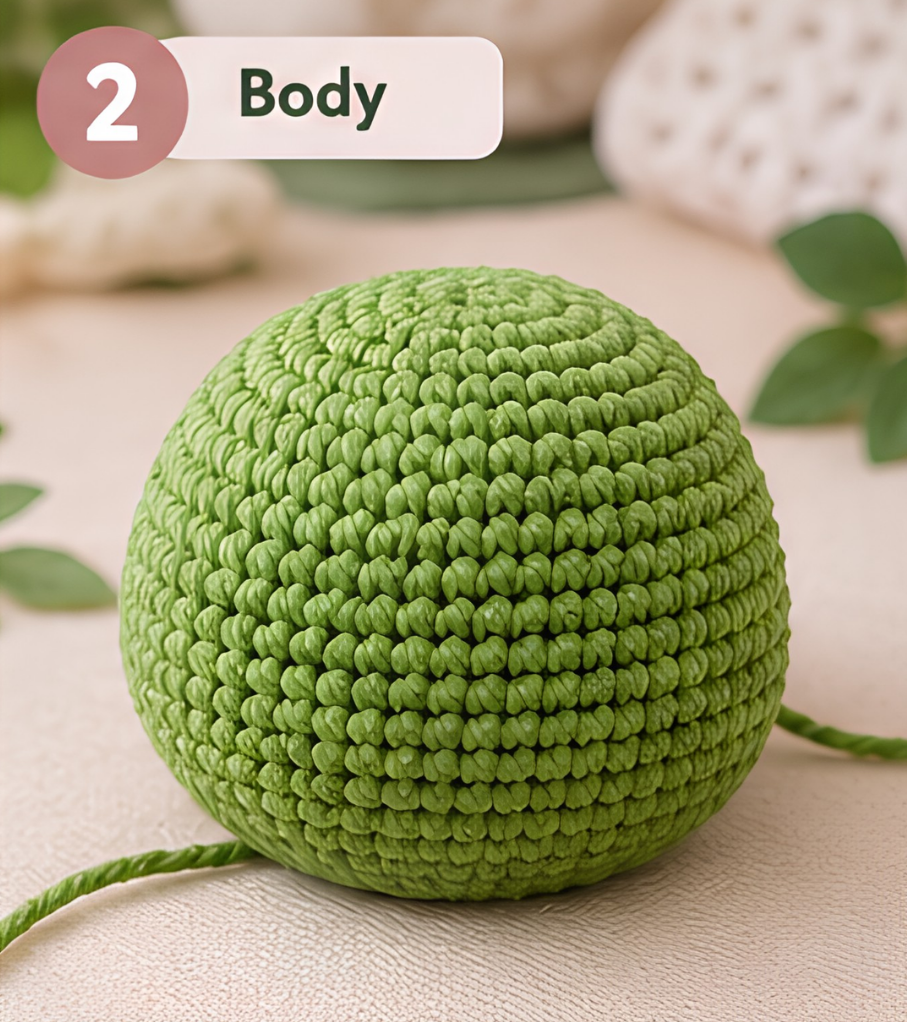
Step 1: Crochet the Frog’s Green Body
The body is the main part of this project.
It consists of a green outer section and a white belly that is attached later.
Start the green section with a magic ring and work single crochet stitches in continuous rounds. The first rounds gradually increase the stitch count, creating a circular base.
As the piece grows, continue working rounds of single crochet to build the height of the body. The reference design eventually reaches a wider section of 60 stitches, with additional rounds worked without increases to establish the shape. 2 in 1 Frog
Keep your tension consistent throughout this part.
Why Tension Matters
Because this is an amigurumi project, the fabric needs to be dense.
If you can easily see the stuffing through the stitches, your tension may be too loose. In that case, consider changing to a smaller hook rather than simply pulling your stitches tighter.
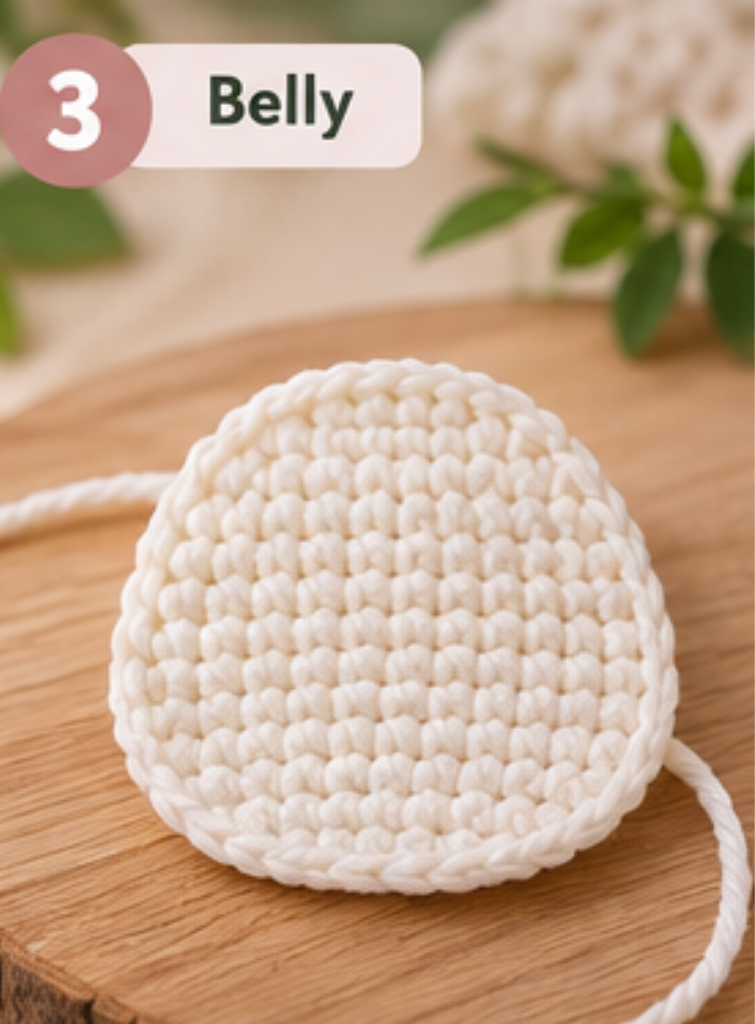
Step 2: Create the White Belly
The contrasting belly is one of the details that makes this little frog so recognizable.
Using white yarn, crochet a separate rounded piece in the round.
The belly begins with a small magic ring and gradually expands through a series of increases. By the final rounds, it forms a smooth oval-shaped piece that fits against the front of the green body. 2 in 1 Frog
Once the belly is finished, fasten off and leave enough yarn for sewing.
Before attaching it permanently, place the white piece against the body and check that it is centered.
Crocheter’s Tip
Use a few sewing pins to temporarily hold the belly in position. This makes it much easier to keep the piece straight while sewing.
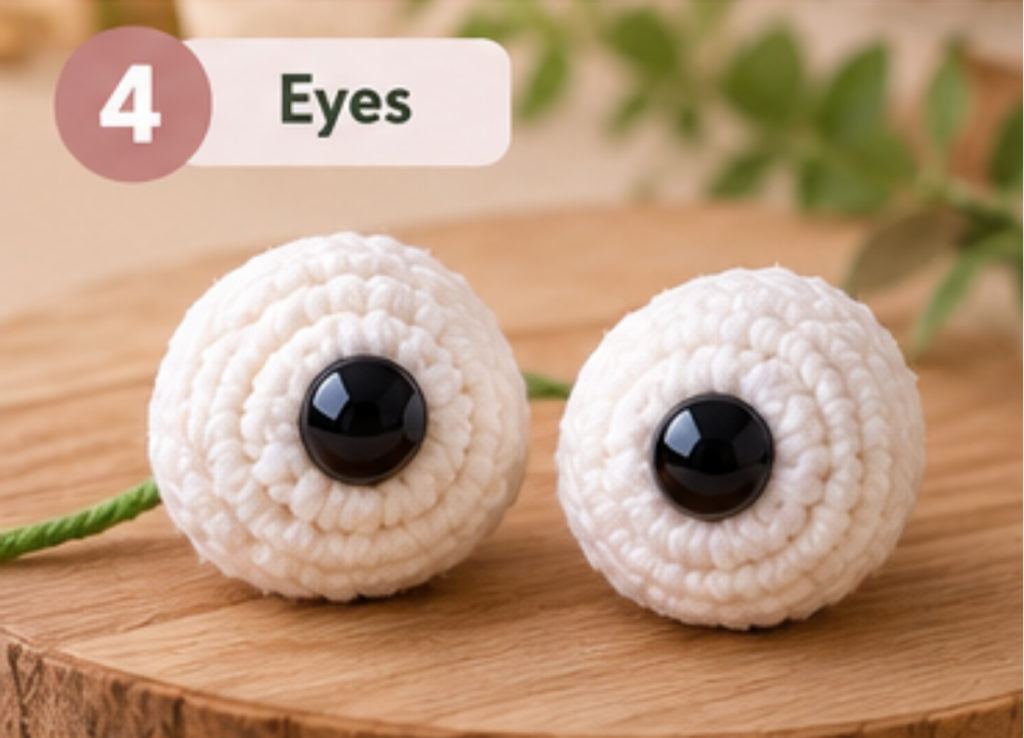
Step 3: Make the Frog’s Eyes
Now for one of the cutest parts—the eyes!
Make two identical white eye pieces.
Each eye is crocheted in the round, beginning with a small magic ring. The piece is expanded through increases and then maintained for several rounds before decreases are used to close the shape.
A 6 mm safety eye is inserted into the center of each crocheted eye. The eye is then lightly stuffed before the opening is closed. 2 in 1 Frog
Don’t overfill these small pieces. You want them to remain rounded without becoming too firm.
Leave a long yarn tail on each eye so you can use it later during assembly.
Step 4: Add the Green Eyelids
The green eyelids are made separately and placed around the white eyes.
Create two small green pieces using single crochet worked in rounds. The pieces are shaped with increases and then continued for several rounds to create their rounded form. 2 in 1 Frog
The eyelids are not stuffed.
Once finished, leave enough yarn for sewing.
When combined with the white eyes, these green pieces give the frog its characteristic wide-eyed expression.
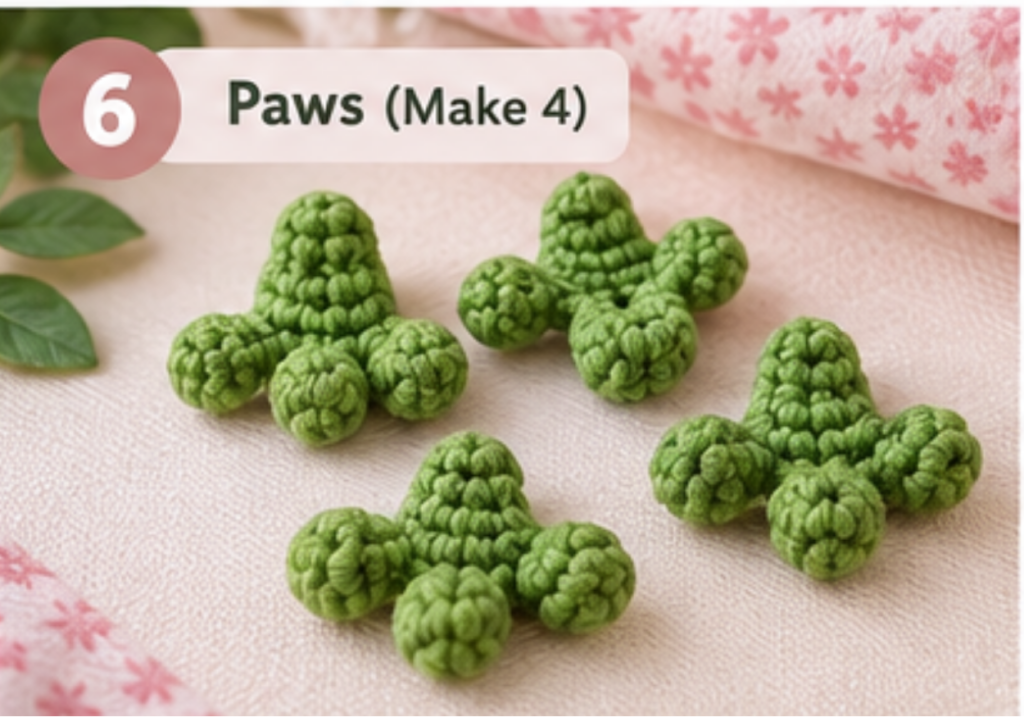
Step 5: Crochet the Tiny Paws
A cute frog needs tiny feet—and this design has four of them!
The paws are created with a small circular base and delicate toes.
The toe details are formed using chains and puff stitches before being connected back to the main piece with slip stitches. 2 in 1 Frog
Make four paws in total.
Because these pieces are very small, don’t worry if they look a little unusual while you’re crocheting them. Their final shape becomes much clearer once they are attached to the body.
Tip for Small Crochet Pieces
When working tiny pieces, count your stitches carefully and use a stitch marker if necessary. Small differences can become more noticeable when the pieces are assembled.
Step 6: Crochet the Little Tongue
The tiny red tongue adds a playful finishing touch.
Start with a short chain using red yarn. Work single crochet stitches along the chain and around its opposite side to create a small curved piece. Finish with a slip stitch and leave a yarn tail for sewing. 2 in 1 Frog
This is a very small component, so it should only take a few minutes to make.
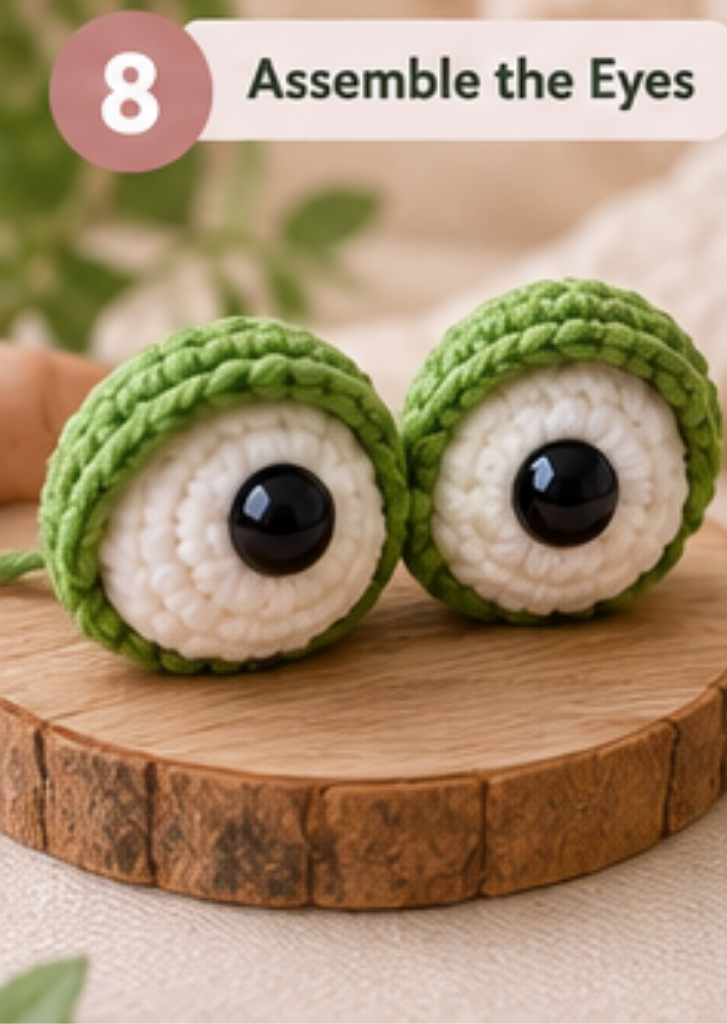
Step 7: Assemble the Eyes and Eyelids
Once all your pieces are ready, it’s time to bring your frog to life.
First, position each white eye inside its corresponding green eyelid.
Sew the eyelid securely around the eye, taking care to keep the two eyes similar in shape.
The assembly sequence in the reference shows the eyes being prepared individually before they are attached to the main body. 2 in 1 Frog
Take Your Time With the Eyes
The placement of the eyes has a big effect on the personality of an amigurumi character.
Before sewing, hold both eyes against the body and look at your frog from the front.
Step 8: Attach the Eyes to the Body
Position both completed eyes on the upper front portion of the frog.
The reference assembly places the eyes on the upper section of the body, with the two eyes positioned next to each other. 2 in 1 Frog
Use the long yarn tails to sew the eyes securely into place.
Check the frog from different angles as you work.
If one eye appears higher than the other, make the adjustment before finishing the sewing.
Step 9: Sew on the Front Paws
Next, attach two paws to the lower front portion of the frog.
The paws should sit symmetrically on either side of the belly.
Pin them in position first, then sew them securely using the yarn tails.
The reference assembly photographs show the front paws positioned around the lower sides of the frog. 2 in 1 Frog
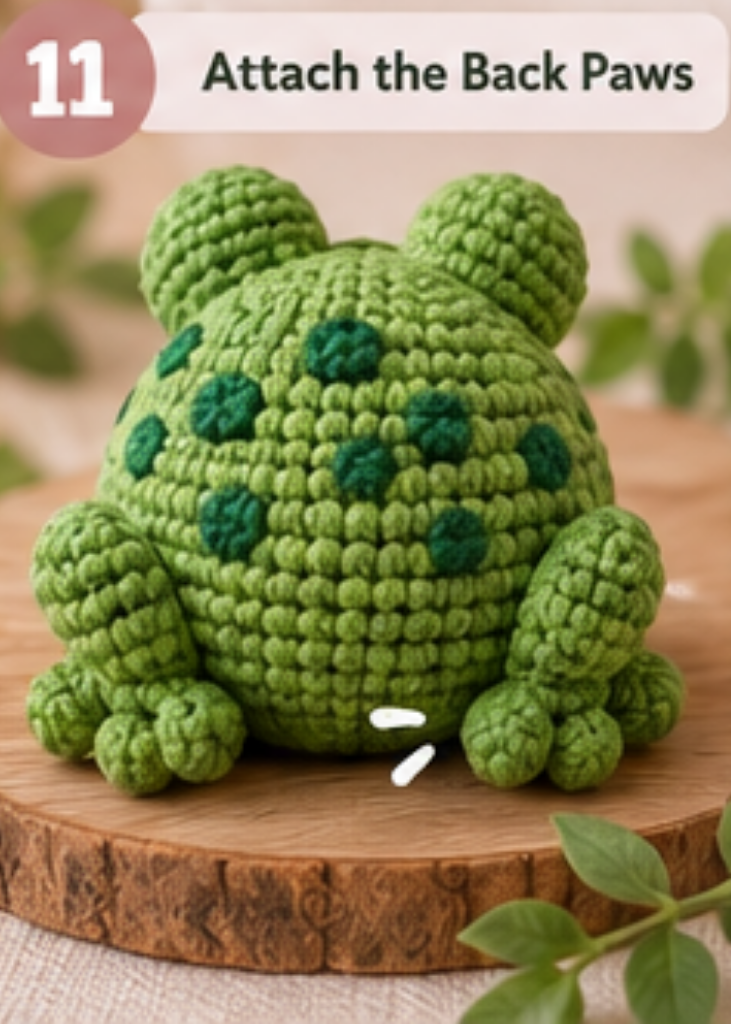
Step 10: Attach the Back Paws
The remaining two paws are attached toward the lower back of the frog.
Position them carefully and compare both sides before sewing.
The original assembly sequence specifically demonstrates the placement of the back paws from different angles, which is helpful when checking their symmetry. 2 in 1 Frog
Once you’re happy with the position, sew them firmly to the body.
Step 11: Add the Tongue
Your little frog is almost finished!
Place the red tongue on the front of the frog and use the remaining yarn tail to sew it securely into place.
A few neat stitches should be enough to hold this tiny piece in position. 2 in 1 Frog
Step 12: Add Decorative Details
For an extra touch of personality, you can decorate the frog’s back.
The reference project uses French knots made with dark green yarn to create small decorative spots. 2 in 1 Frog
You can arrange the spots randomly or create your own pattern.
The original instructions also mention green beads as another decorative possibility. 2 in 1 Frog
For projects intended for small children, securely embroidered details are generally preferable to loose small embellishments.
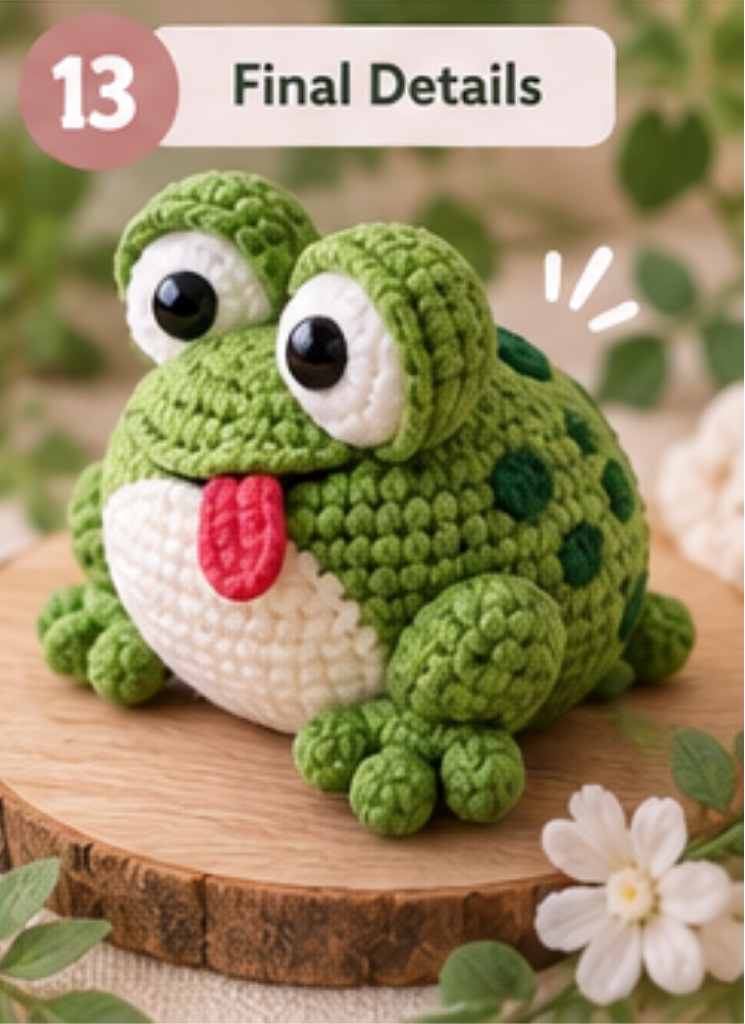
Your Crochet Frog Is Finished! 🐸
And there you have it—a tiny handmade frog with a cheerful face, little toes, and a playful tongue.
What makes this project particularly fun is the way several simple components come together to create a character with lots of personality.
The final frog combines:
- A rounded green body
- A contrasting white belly
- Large expressive eyes
- Green eyelids
- Four tiny paws
- A small red tongue
- Decorative spots
The completed project shown in the reference has an approximate size of 7 cm (2.7 inches) when made with the specified materials. 2 in 1 Frog
Tips for Making Your Crochet Frog
1. Keep Your Stitches Tight
This is one of the most important tips for amigurumi. Tight stitches help create a clean surface and prevent the stuffing from showing.
2. Stuff Gradually
Instead of adding all the stuffing at once, add small amounts as you shape the body.
3. Check Symmetry
Before permanently sewing the eyes and paws, look at your frog from the front.
4. Don’t Rush the Assembly
The individual crochet pieces may look simple, but careful assembly is what gives the finished frog its character.
5. Experiment With Colors
Although the classic version uses green, white, and red, you can experiment with different shades to create your own unique frog.
Frequently Asked Questions
How big is the finished crochet frog?
The reference project measures approximately 7 cm (2.7 inches) when made with the specified materials. 2 in 1 Frog
What crochet hook size is used?
The original project uses a 2 mm crochet hook. 2 in 1 Frog
What yarn is suitable for this crochet frog?
The reference uses 100% cotton yarn. A similar cotton yarn can be used, although changing yarn weight and hook size may affect the final dimensions. 2 in 1 Frog
Is stuffing required?
Yes. The body and eyes are stuffed during construction. The source specifically recommends hollow-fiber/polyester-style stuffing. 2 in 1 Frog
Can I make the frog without safety eyes?
The original project uses 6 mm safety eyes or black beads. 2 in 1 Frog
For a handmade toy intended for very young children, embroidered eyes can be considered instead of detachable components.
Final Thoughts
Small amigurumi projects like this little frog are a great way to practice working in the round, shaping with increases and decreases, and assembling several crochet components into one finished character.
Once you’ve made your first frog, you can experiment with different yarn colors, facial expressions, and decorative details to create your own collection of tiny crochet animals.
Happy crocheting, and enjoy making your little frog!