How to Make a Cute Crochet Doll with a Dress and Monster-Themed Accessories
There is something especially charming about a handmade crochet doll with tiny details, colorful clothing, and miniature accessories.
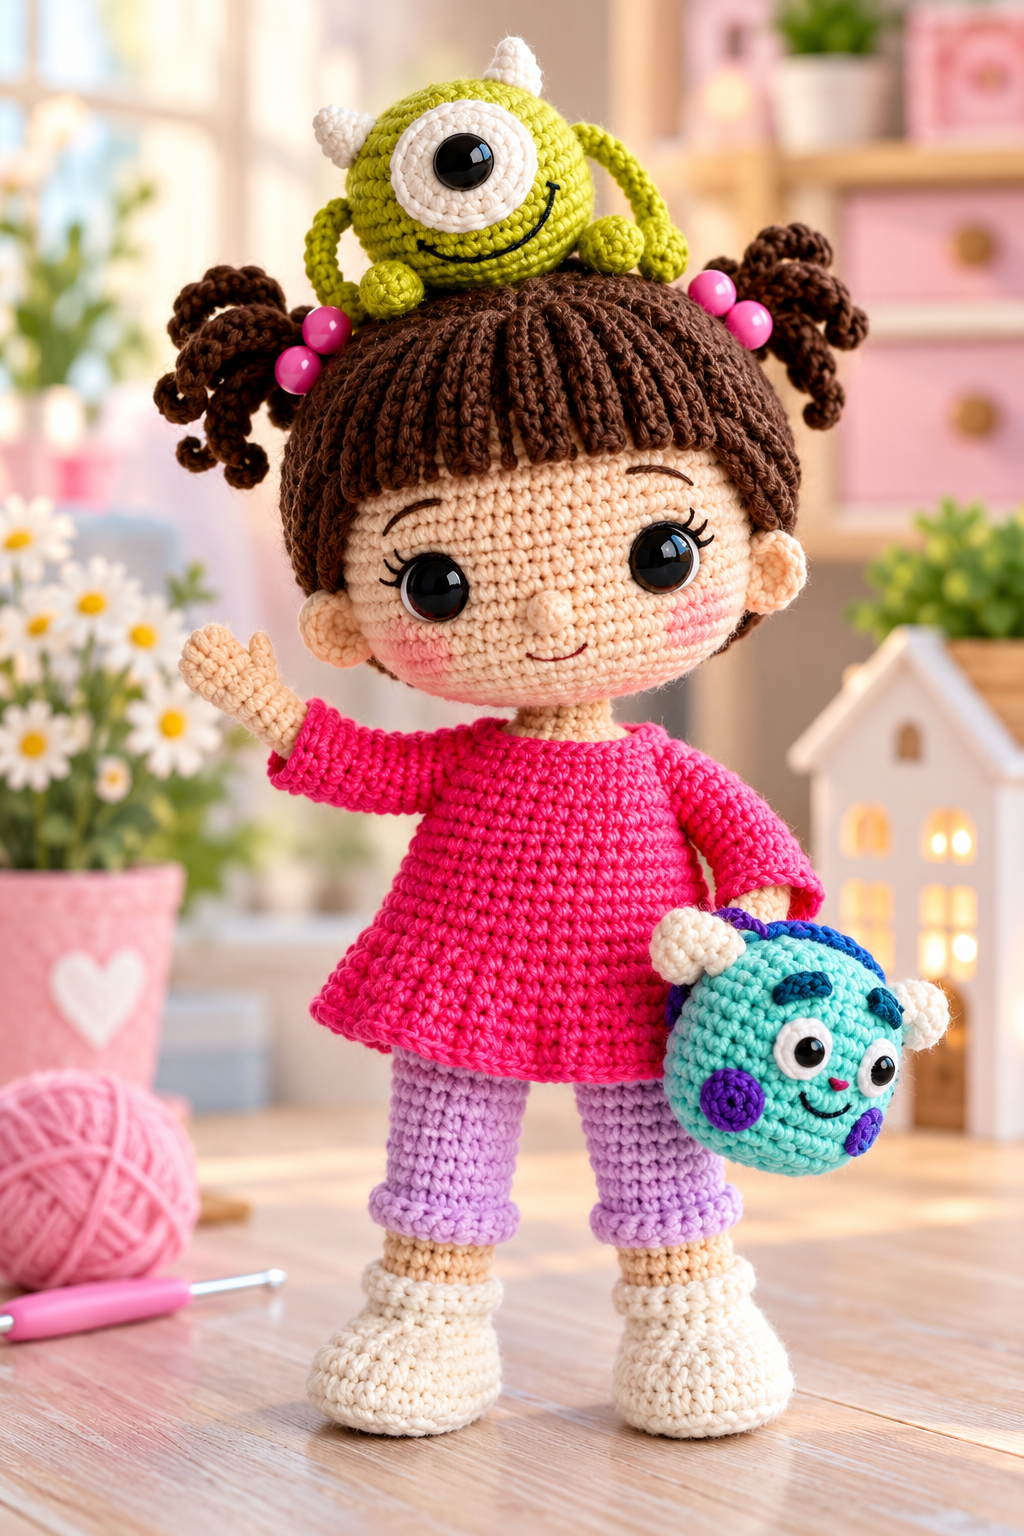
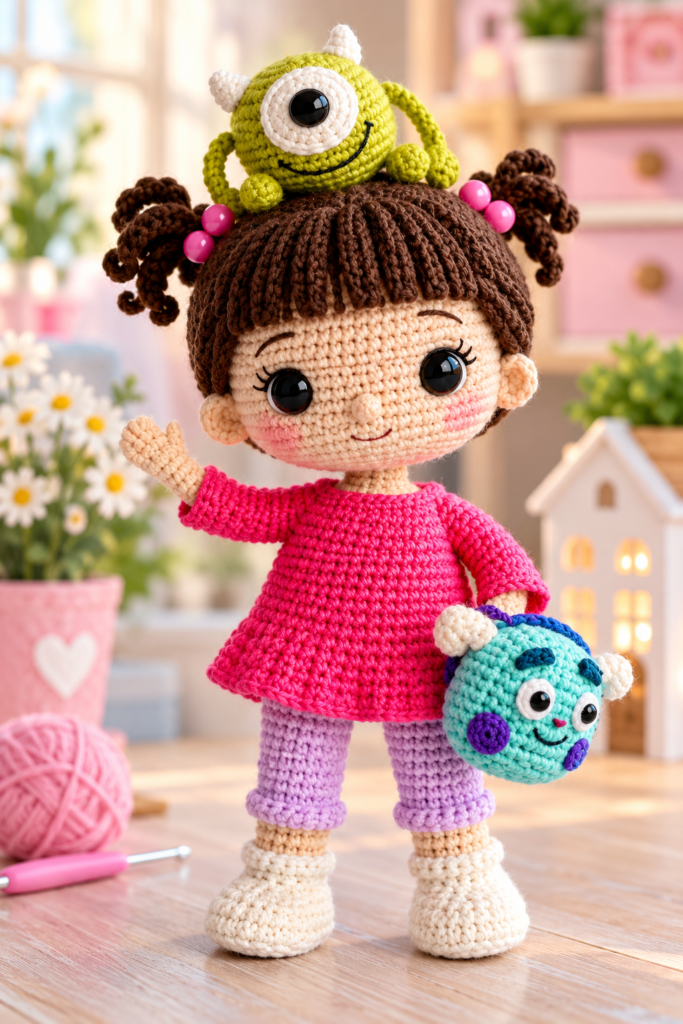
The Doll Boo project in the source pattern combines all three. The main doll has a soft beige face, brown hair styled into small ponytails, a bright pink dress, lilac leggings, and little white shoes. The finished design is then complemented by playful monster-themed crochet accessories.
This is a more involved amigurumi project than a very simple beginner toy, but it is also a great opportunity to practice several useful crochet techniques in one project. You will work on shaping, increases and decreases, crocheting in rounds, changing colors, sewing pieces together, adding facial details, and creating small accessories.
This article gives you an original overview of the project, the materials involved, the construction process, and the main details to pay attention to. It is not a reproduction of the source pattern or its step-by-step instructions.
What You’ll Need
Materials
The source calls for several yarn colors because the doll contains many different components.
The main skin color is beige, while brown is used for the hair. White appears in the shoes, eyes, and small horn details. Lilac is used for the leggings, and pink is used for the dress.
The accessories introduce additional colors, including green, mint, blue, milky, and purple. The exact yarn brands and color references are listed in the original source.
You will also need:
- Safety eyes
- Fiberfill stuffing
- Tapestry needle
- Scissors
- A 2 mm crochet hook
- 0.8 mm floral wire for the hand framework
- Adhesive plaster
- Blush
- Four small pink beads
The source also specifies different eye sizes for the doll and the small accessories.
Crochet Stitches and Techniques
Before starting, it helps to be comfortable with basic amigurumi construction.
The pattern uses:
- Chain stitch
- Magic ring
- Single crochet
- Slip stitch
- Half double crochet
- Double crochet
- Treble crochet
- Increases
- Decreases
- Back-loop-only crochet
- Front-loop-only crochet
- A three-half-double-crochet cluster
These techniques are used throughout the different sections rather than being concentrated in one part of the project.
If you are new to amigurumi, pay particular attention to maintaining consistent tension. Small changes in tension can affect the shape of stuffed pieces and the way separate components fit together.
Step 1: Crochet the Doll’s Head
The head is one of the most important parts of the project because it establishes the proportions and facial expression of the doll.
The source begins the head with beige yarn and builds the shape through rounds of increases before working a longer section of even stitches. The piece is stuffed as it develops.
The safety eyes are positioned during the construction of the head rather than being added as an afterthought. The source places them between rounds 21 and 22 with a specified stitch spacing.
When working this part, keep your stuffing firm but even. Lumpy stuffing can become visible through the stitches and can make the head look uneven.
Step 2: Create the Hair and Bangs
The hair gives the doll much of its personality.
The pattern uses brown yarn for several separate hair components. The main hairstyle includes shaped sections that are sewn to the head, while the bangs are worked separately with turning rows and back-loop stitches. Two small ponytail pieces complete the hairstyle.
Take your time when positioning these pieces. Hair placement can dramatically change the expression of a handmade doll.
A useful approach is to temporarily pin or hold each piece in position before sewing it permanently.
Step 3: Add the Ears and Facial Details
Two small beige ears are made separately and attached to the head.
The face is then refined with additional details. The source describes needle sculpting around the eye area and gives a specific approach for creating the nose.
This is one of the places where careful finishing makes a noticeable difference.
Rather than pulling the embroidery or sculpting stitches too tightly, work gradually and check the face from several angles. The goal is a soft, balanced expression.
Step 4: Crochet the Hands and Legs
The hands are small stuffed pieces worked in the main beige color. A bubble detail is incorporated into their construction.
The legs are more elaborate. They begin with white yarn for the shoes, include shaped soles, and then transition through the main beige and lilac colors.
An especially interesting construction detail is the use of separate insoles. The source recommends tracing the crocheted sole shape onto thick cardboard or plastic, cutting the pieces out, and incorporating them into the shoes.
The leg construction then continues upward, with shaping around the knees and color changes.
The source also uses front-loop stitches later to add additional color details around the footwear.
Step 5: Build the Body
The body begins with lilac yarn and is constructed around the legs.
Once the lower section has been established, the color changes to beige for the upper body. The arms are incorporated into the construction, which helps create a clean transition between the body and limbs.
After the body has been shaped, the source introduces a wire framework inside the hands. This is intended to give the arms additional structure and positioning possibilities.
Because wire is involved, take extra care to keep the ends secure and covered. The source specifically lists adhesive plaster among the materials, so follow the source’s construction approach rather than leaving exposed wire inside the finished toy.
Step 6: Make the Pink Dress
The bright pink dress is one of the most recognizable parts of the design.
The dress is constructed separately from the body, beginning with two sleeves and then a larger circular section. The sleeves are subsequently joined into the main dress structure.
The later rows shape the garment and create its slightly flared appearance. A final section is also crocheted around the first row of the dress.
Because the dress is fitted to the doll, consistent stitch tension is especially useful here. A dress that is significantly tighter or looser than the intended proportions may affect how easily the head and body are assembled.
Step 7: Make the Small Green Monster Accessory
The source includes a small green monster-inspired companion with a single large eye, arms, legs, and horns.
Its head and body are worked as one compact stuffed form. The shape grows from a magic ring and then narrows toward the top.
Separate white eye components are then made, with the eye positioned in the center before the component is attached to the green body. Additional green pieces form the small limbs, while white yarn is used for the horns.
The source also specifies attachment areas for the eye, hands, legs, and horns and adds a dark green embroidered mouth.
Step 8: Create the Mint Monster Backpack
The second accessory is a small mint-colored monster-themed backpack.
Its front and back sections are crocheted separately. The front detail is worked first, followed by the corresponding back piece. The source then instructs the maker to turn and sew the pieces together and fill the backpack firmly.
The decorative details include:
- Two eyes
- Two horns
- Two eyebrows
- A large purple spot
- A smaller purple spot
- A top loop
- Two side straps
These small pieces create the recognizable monster-like appearance of the accessory.
This section is a good reminder that miniature accessories do not need to be complicated to be visually effective. A few contrasting colors and carefully placed details can completely change a simple crocheted shape.
Step 9: Assemble the Doll
Once all major pieces are complete, assembly brings the character together.
The ears are attached to the head, while the head and body are joined after the dress has been put onto the doll. The source also specifies that the body is sewn behind the last row of the head.
At this stage, check the doll from the front, side, and back before making the final stitches.
Pay particular attention to:
- Eye alignment
- Ear placement
- Hair symmetry
- Position of the arms
- Foot orientation
- Head-to-body alignment
- Placement of the dress
- Position of the accessories
Small adjustments before the final sewing can make the finished doll look much more polished.
Helpful Crochet Tips
Keep your stuffing consistent
For amigurumi, uneven stuffing can change the shape of a piece. Add small amounts gradually rather than filling everything at once.
Mark your rounds
The project contains many increases, decreases, and repeated rounds. A stitch marker can make it much easier to keep track of your position.
Check placement before sewing
Hair, facial features, ears, limbs, and accessories should ideally be positioned temporarily before being permanently sewn.
Keep color changes tidy
The doll uses many colors. Secure and hide yarn tails neatly so they do not interfere with the shape of the finished pieces.
Take extra care with wire
The source uses floral wire for the hand framework. Make sure the ends are safely covered and cannot work their way through the crochet fabric.
Use the photos as construction references
The PDF’s photographs are particularly useful for understanding the orientation of the shoes, body, hair, monster accessory, backpack, and final assembly. For example, the pages covering the legs show both the insole construction and the completed shoe shape.
Frequently Asked Questions
What crochet hook size does the source use?
The pattern specifies a 2 mm crochet hook.
What yarn colors are needed?
The project uses beige, brown, white, lilac, green, milky, mint, pink, blue, and purple yarns across the doll and accessories.
What type of crochet project is Doll Boo?
It is an amigurumi-style crochet doll with clothing and small monster-themed accessories.
Is the finished size specified?
No. The uploaded PDF does not provide a finished height or overall finished dimensions.
Does the doll use stuffing?
Yes. Fiberfill is listed among the required materials, and the head, hands, legs, body, and accessory components are constructed with stuffing at different stages.
Are safety eyes used?
Yes. The source lists 9 mm safety eyes for Boo, smaller eyes for the other accessories, and a separate eye size for the small green monster.
Does the project require sewing?
Yes. Multiple crocheted components are sewn together, including hair, ears, facial/accessory pieces, the backpack sections, and the doll’s head and body.
Is this a beginner project?
The source does not assign a difficulty level. Based strictly on the techniques presented, the project includes several different construction methods, shaping techniques, color changes, assembly steps, and a wire-supported component. A crocheter should therefore be comfortable with basic amigurumi techniques before attempting the complete project.
Final Thoughts
Doll Boo is a detailed crochet project that combines a handmade doll, clothing, miniature footwear, expressive facial details, and playful accessories into one character-inspired design.
What makes the project especially interesting is the variety of techniques involved. You move from simple amigurumi rounds to shaped shoes, hair construction, clothing, facial finishing, wire-supported hands, and tiny decorative accessories.
The original PDF finishes with the completed doll and its accessories, showing the individual components brought together into the final character.
If you enjoy detailed amigurumi and colorful handmade characters, this type of project can be a rewarding way to practice several crochet skills in one piece.
Love crochet projects like this? Explore more free crochet ideas and creative patterns here on Crochetya, and come back soon for another handmade project.